


Table of Contents
- What You'll Need Before You Start Engraving
- Laser Engraving vs Hand Engraving: Which Method Fits Your Project?
- Step 1: Prepare Your Artwork and Files for Custom Engraving
- Step 2: Dial In Laser Power, Speed, and Focus
- Step 3: Align, Center, and Secure Your Substrate
- Best Fonts for Custom Engraving (and Which to Avoid)
- Common Custom Engraving Mistakes and How to Prevent Them
- Quality Control: How to Inspect Custom Engraving Before It Ships
- Frequently Asked Questions
Last Updated: September 30, 2026
What You'll Need Before You Start Engraving
Quality custom engraving starts with preparation. Before you begin, gather these essentials:
- A clean, well-lit workspace with a stable surface
- Your artwork file in the correct format (vector or high-resolution raster)
- A test piece of the same material you plan to engrave
- Calibration tools for your laser or hand tools
- Safety gear including proper ventilation and eye protection
- A magnifying loupe for quality checks
Laser Engraving vs Hand Engraving: Which Method Fits Your Project?
Custom engraving falls into two categories: laser and hand. The right choice depends on your project's details, quantity, and desired look.
When Hand Engraving Wins
Hand engraving cuts designs directly into metal, glass, or stone. It shines for:
- One-of-a-kind depth and texture that machines cannot copy
- Traditional look for heirloom jewelry or fine watches
- Irregular surfaces like curved rings or rounded pendants
- Small batches where setup time for a laser is not worth it
When Laser Engraving Wins
Laser engraving uses a focused beam to burn or etch a design into the surface. It wins for:
- Speed and repeatability across dozens or hundreds of pieces
- Fine detail on flat surfaces like plaques, mugs, and flat pendants
- Consistency so every piece in a batch looks identical
- Complex vector designs with tight curves and small text
| Factor | Hand Engraving | Laser Engraving |
|---|---|---|
| Best for | Heirloom jewelry, curved surfaces | Flat items, batches, fine text |
| Speed | Slow, hours per piece | Fast, minutes per piece |
| Depth | Deep, tactile cuts | Shallow surface marks |
| Consistency | Varies by hand | Highly repeatable |
| Cost per piece | High | Lower at volume |
Step 1: Prepare Your Artwork and Files for Custom Engraving
File preparation decides whether your custom engraving looks sharp or muddy, the wrong format ruins a design before the machine starts.
Vector vs. Raster: Choosing the Right File Format
Vector files use math to define lines and curves, scaling to any size without losing sharpness. Use SVG, AI, and EPS for logos, text, and clean-line designs.
- Vector (SVG, AI, EPS): logos, text, line art, simple shapes
- Raster (PNG, JPG, TIFF): photos, painted textures, soft shading
Resolution and DPI Settings That Prevent Muddy Results
DPI controls how fine the laser fires. For most custom engraving, 300 to 600 DPI delivers clean lines and sharp text; go higher for tiny detail, lower for large fills where speed beats finesse.
Step 2: Dial In Laser Power, Speed, and Focus
Laser power, speed, and focus work together, change one and you must adjust the others. Get them right for clean lines; get them wrong for burn marks or a fire. Here is what each variable does to the mark:
- Power (percentage of tube output): Controls how much energy reaches the surface. More power means deeper cuts and darker contrast, but too much causes charring or burn-through on thin stock.
- Speed (inches or millimeters per second): Controls how long the beam dwells on any single point. Faster speed lightens the mark; slower speed darkens and deepens it.
- Focus (focal length and lens): Sets where the beam is narrowest and most intense. A 2-inch lens gives a tight spot for fine detail; a 4-inch lens spreads the beam for deeper cuts over uneven surfaces.
- Frequency (pulses per inch, on many CO2 and fiber systems): Controls how densely the pulses overlap. Higher frequency produces a smoother, more continuous mark; lower frequency leaves a stitched or dotted texture.
Starting Points by Material
These are common starting ranges for a 40-60W CO2 laser. Treat them as a first test, not a final answer, because every tube, lens, and batch behaves differently.
| Material | Power | Speed | Notes |
|---|---|---|---|
| Basswood / plywood | 30-50% | 40-60% | Watch for resin flare-up on knots |
| Cast acrylic | 25-45% | 50-70% | Extruded acrylic frosts unevenly; cast gives cleaner contrast |
| Anodized aluminum (fiber) | 40-60% | 60-80% | Engraves the coating, not the metal |
| Bare stainless (fiber) | 60-80% | 20-40% | Needs slower speed to build contrast |
| Glass | 20-40% | 40-60% | Use a wet paper mask to reduce chipping |
| Leather | 15-30% | 60-80% | Low power only; high power burns and smells |
Run a Test Pattern Before Every New Material
A test pattern is a small grid of squares engraved at different power and speed settings, showing which combo works before you touch your real piece. Vary one variable at a time: hold speed constant, step power in 5% increments, then repeat at the next speed.
Run a test pattern for:
- Every new material
- Every new batch of the same material
- Any time you change the lens or focal length
- Any time you swap the tube or clean the mirrors
Focus and Alignment Checks
Focus is the variable most often set wrong. Use a focus gauge or the manufacturer's focal spacer to set lens-to-surface distance, then confirm with a ramp test: angle a scrap piece, fire a single line, and the narrowest point marks true focus. For uneven surfaces like curved pendants or tumblers, a longer focal length lens gives more depth of field; for flat work, a shorter lens wins.
Troubleshooting the Mark
- Too light or washed out: Slow the speed or raise power in small steps.
- Charred edges or a brown halo: Lower power, raise speed, or increase air assist.
- Inconsistent depth across the piece: The bed is not level, or the material thickness varies. Re-level and re-focus.
- Dotted or stitched lines: Raise frequency, or check that the belt tension and mirror alignment are correct.
Operators often chase power when the real problem is focus. Check focus first, then adjust power and speed together.
Step 3: Align, Center, and Secure Your Substrate
Misalignment is the most common cause of ruined custom engraving. If the substrate shifts or sits off-center, the design lands in the wrong place.
Follow these steps:
- Mark your center point on the substrate with a light pencil or tape.
- Use alignment jigs to hold the piece in the same spot every time.
- Lock the substrate down with clamps or double-sided tape.
- Run a dry pass with the laser off to trace the design outline.
- Check the placement before you fire the beam.
Best Fonts for Custom Engraving (and Which to Avoid)
Font choice makes or breaks readability: thin fonts disappear, and ornate scripts blur at small sizes.
- Good choices: Arial, Helvetica, Georgia, Times New Roman, Montserrat
- Use with care: Script fonts like Brush Script, but only at large sizes
- Avoid: Hairline fonts, fonts with heavy serifs at small sizes, and fonts with tight letter spacing
Common Custom Engraving Mistakes and How to Prevent Them
Most custom engraving errors trace back to a handful of fixable problems.
| Mistake | Cause | Fix |
|---|---|---|
| Burn-through | Power too high for thin material | Lower power, raise speed, test first |
| Blurry text | Low DPI or raster file | Use vector files, raise DPI to 300+ |
| Off-center design | No jig or alignment | Mark center, use jigs, dry pass first |
| Inconsistent depth | Material variation | Test each new batch, adjust settings |
| Fire or scorch marks | Wrong focal length | Recheck focus, clean the lens |
Quality Control: How to Inspect Custom Engraving Before It Ships
Inspection is the last line of defense. A piece that looks fine at arm's length can show flaws up close. Check every piece under bright light before it leaves your bench.
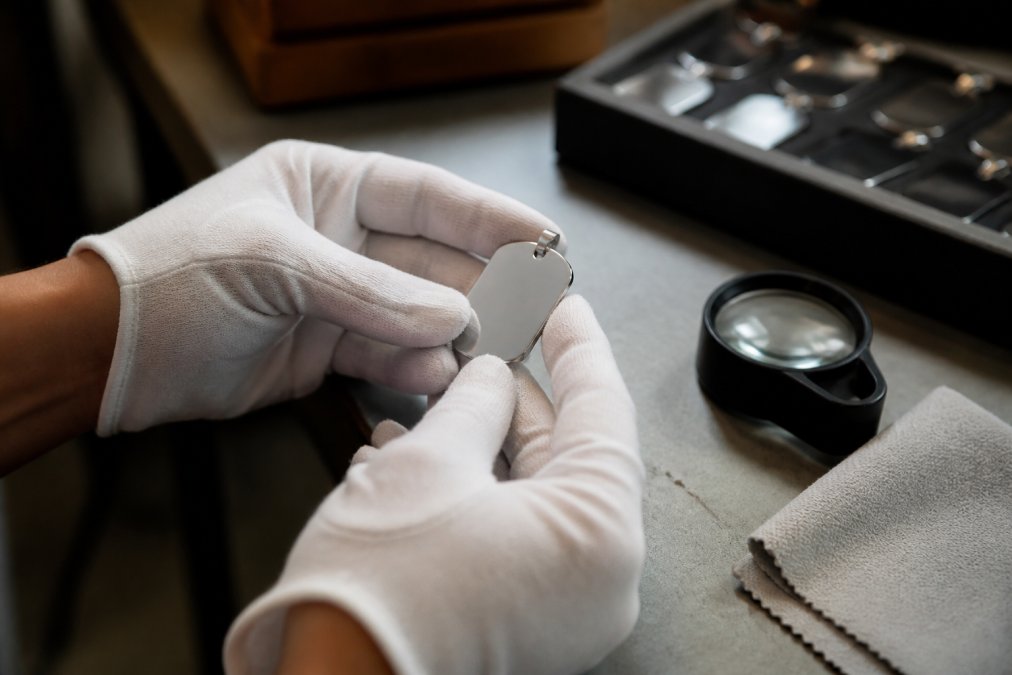
Run through this checklist for every piece:
- Text is spelled correctly and matches the order
- Design is centered and level
- Lines are clean with no burn or blur
- Depth is even across the whole design
- Surface has no scratches or smudges
- Edges are free of burrs or rough spots
Post-Engraving Finishing: The Step Most Guides Skip
The cut is only half the job. What separates professional engraving from hobbyist work is what happens after the laser stops, this finishing workflow determines how the piece looks and holds up.
-
Apply acrylic craft paint or a dedicated fill paint over the engraved area with a squeegee or foam brush.
-
Let it cure per the label, usually 15-30 minutes for a thin coat.
-
Wipe the surface with a damp cloth or a light solvent wipe, leaving paint only in the recessed lines.
-
Seal if the piece will be handled or washed.
-
Clear lacquer or acrylic spray for metal and painted fills
-
Food-safe oil or wax for wood items that touch food or skin
-
UV-resistant clear coat for outdoor signage and plaques
What Buyers Should Look For
For buyers ordering custom engraved gifts online, the same workflow applies. Look for vendors showing real photos of finished work, not just digital previews, and ask whether they paint-fill, polish, and seal their engravings or ship straight off the laser. A shop that finishes and inspects every piece protects you from a flawed gift.
Frequently Asked Questions
How can you tell if a custom engraving is high quality?
Check three things: line consistency, depth uniformity, and edge sharpness. High-quality custom engraving has clean lines with no burn-through or fuzzy edges, even depth across the entire design, and crisp contrast between the engraved area and the surrounding substrate. Hold the piece at an angle under bright light. If you see uneven depth, discoloration, or jagged letterforms, the laser power or focal length was off. On jewelry, also check that the engraving does not compromise structural integrity or catch on fabric.
Is laser engraving better than hand engraving for custom gifts?
It depends on the look you want. Laser engraving delivers precise, repeatable results ideal for text, logos, and fine detail on metals, wood, and acrylic. Hand engraving creates deeper, sculpted cuts with a warmth and individuality that machines cannot replicate, which suits one-of-a-kind heirloom pieces. For most personalized gifts ordered online, laser engraving offers better consistency and faster turnaround. For high-end jewelry with curved surfaces, hand engraving often produces a more refined finish.
What should I provide to ensure accurate custom engraving?
Send vector files (SVG, AI, or EPS) whenever possible, since they scale without losing sharpness. If you only have a raster image, supply it at 300 DPI or higher at the final engraving size. Specify the exact text, spelling, capitalization, and font. Include dimensions, placement instructions, and any material details. For logos, confirm you have permission to reproduce the artwork. A short note about the intended use (wearable jewelry vs. display piece) helps the engraver choose the right settings.
How do you prevent common custom engraving mistakes?
Run a test pattern on scrap material before every new substrate. Verify your focal length is set correctly, because even a millimeter off causes blurry edges. Use alignment jigs to hold pieces in place and prevent shifting mid-job. Double-check text for typos before starting. Avoid excessive laser power, which causes burn-through on thin materials. Keep your lens clean and your ventilation running. Finally, inspect the finished piece under magnification before packaging, and keep a log of settings that worked so you can repeat them.


